Tutorial Updating Lock&Puzzle Project on Netlify
Step-by-Step Guide & Tutorial

Update and Re-upload Your Project to Netlify

Learn how to modify your digital props and bring them back online

Need to change a password or update the look of an already published puzzle? In this tutorial, we guide you step-by-step through modifying your digital trial configurations and re-uploading your complete project to Netlify hassle-free.
The Three Update Phases

Follow this structured process to make changes to your puzzles and update the public version.

1. Modify Parameters

Edit the settings file (`settings.js`) in your prop's folder to change passwords, images, or messages.

2. Re-upload to Netlify

Drag the entire container folder with all your trials to the "Production Deploys" area in your control panel.

3. Verify Changes

Confirm that you have successfully uploaded the project and test the new functionality directly on the web.

Watch Video Tutorial

Watch it here or view it on YouTube to leave a like.

...or keep reading for the written tutorial.

Phase 1

Modify Project Settings

Click on the images to view them in larger size

1.1

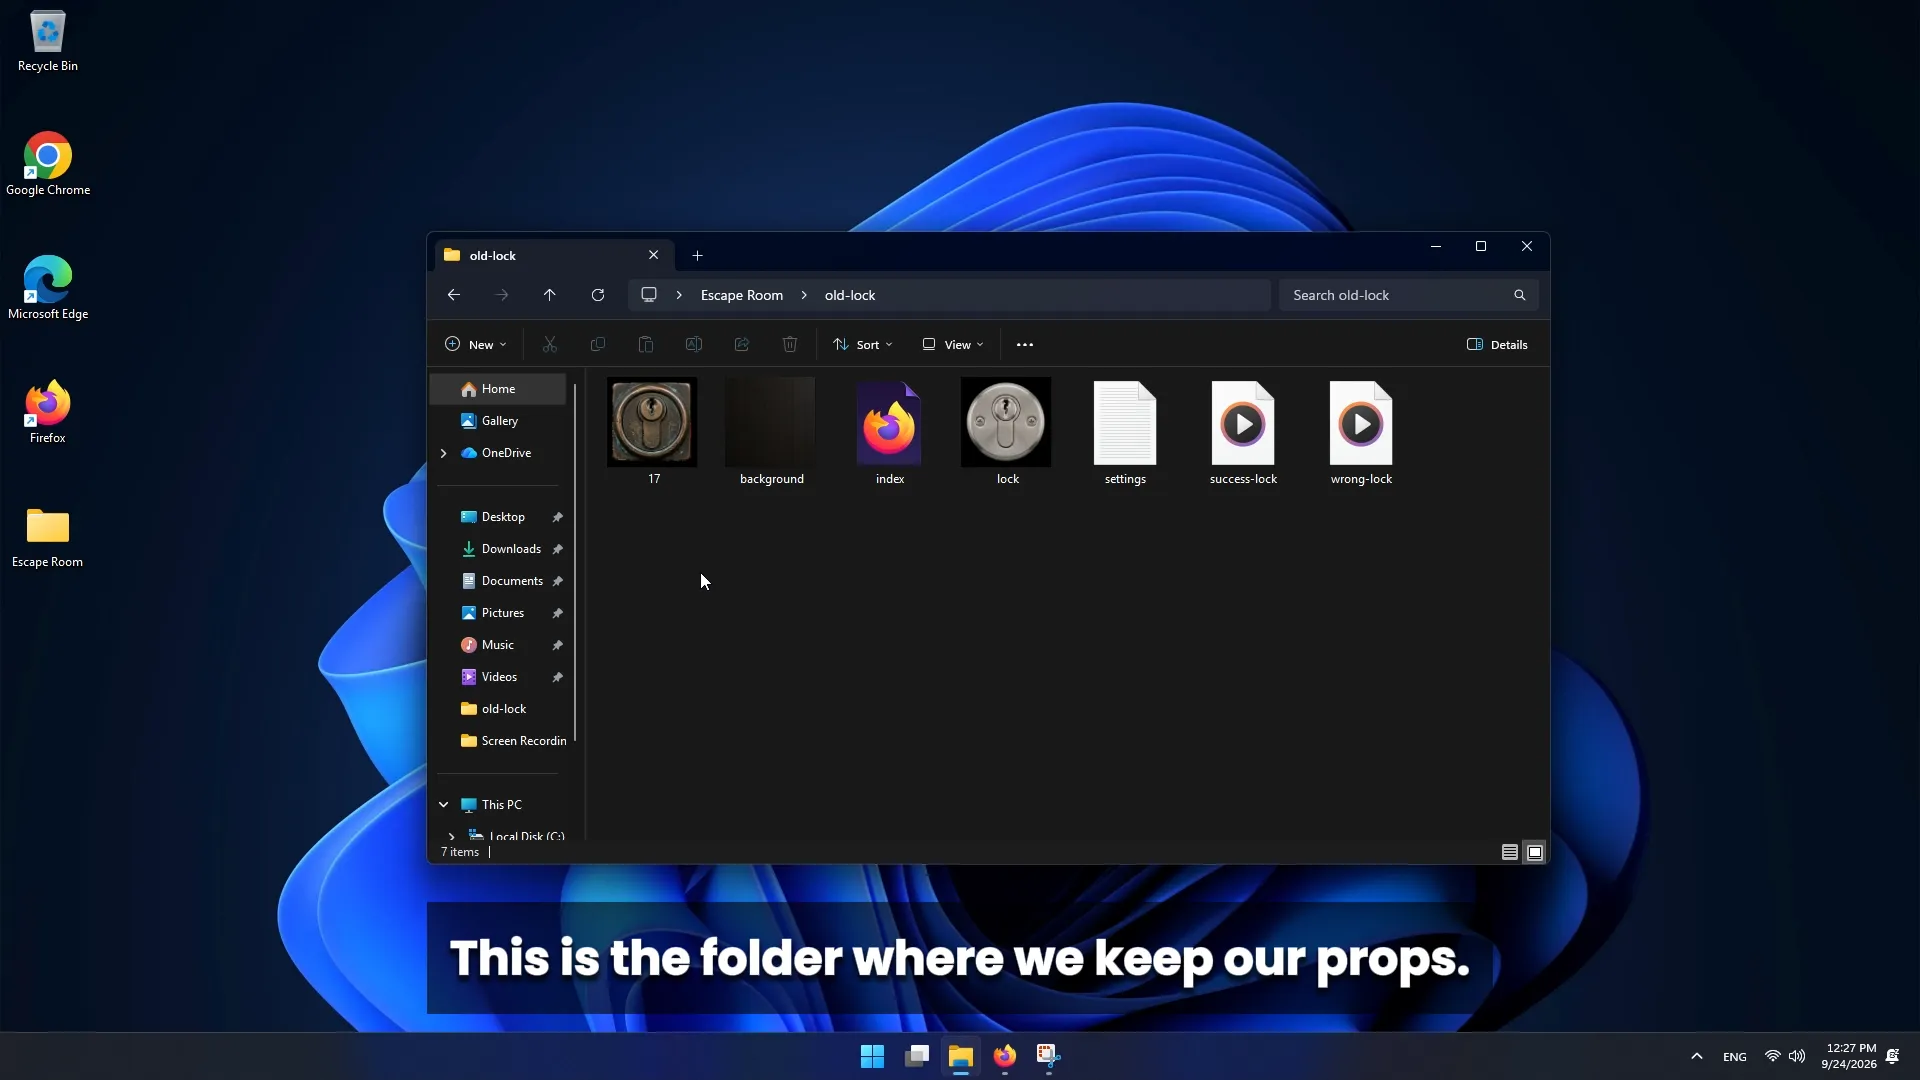
Open the prop folder

Open the prop folder

Access your computer's local folder where you store your different project folders. Open the folder for the specific puzzle you want to modify (for example, old-lock).

1.2

Open and edit settings.js

Edit settings.js

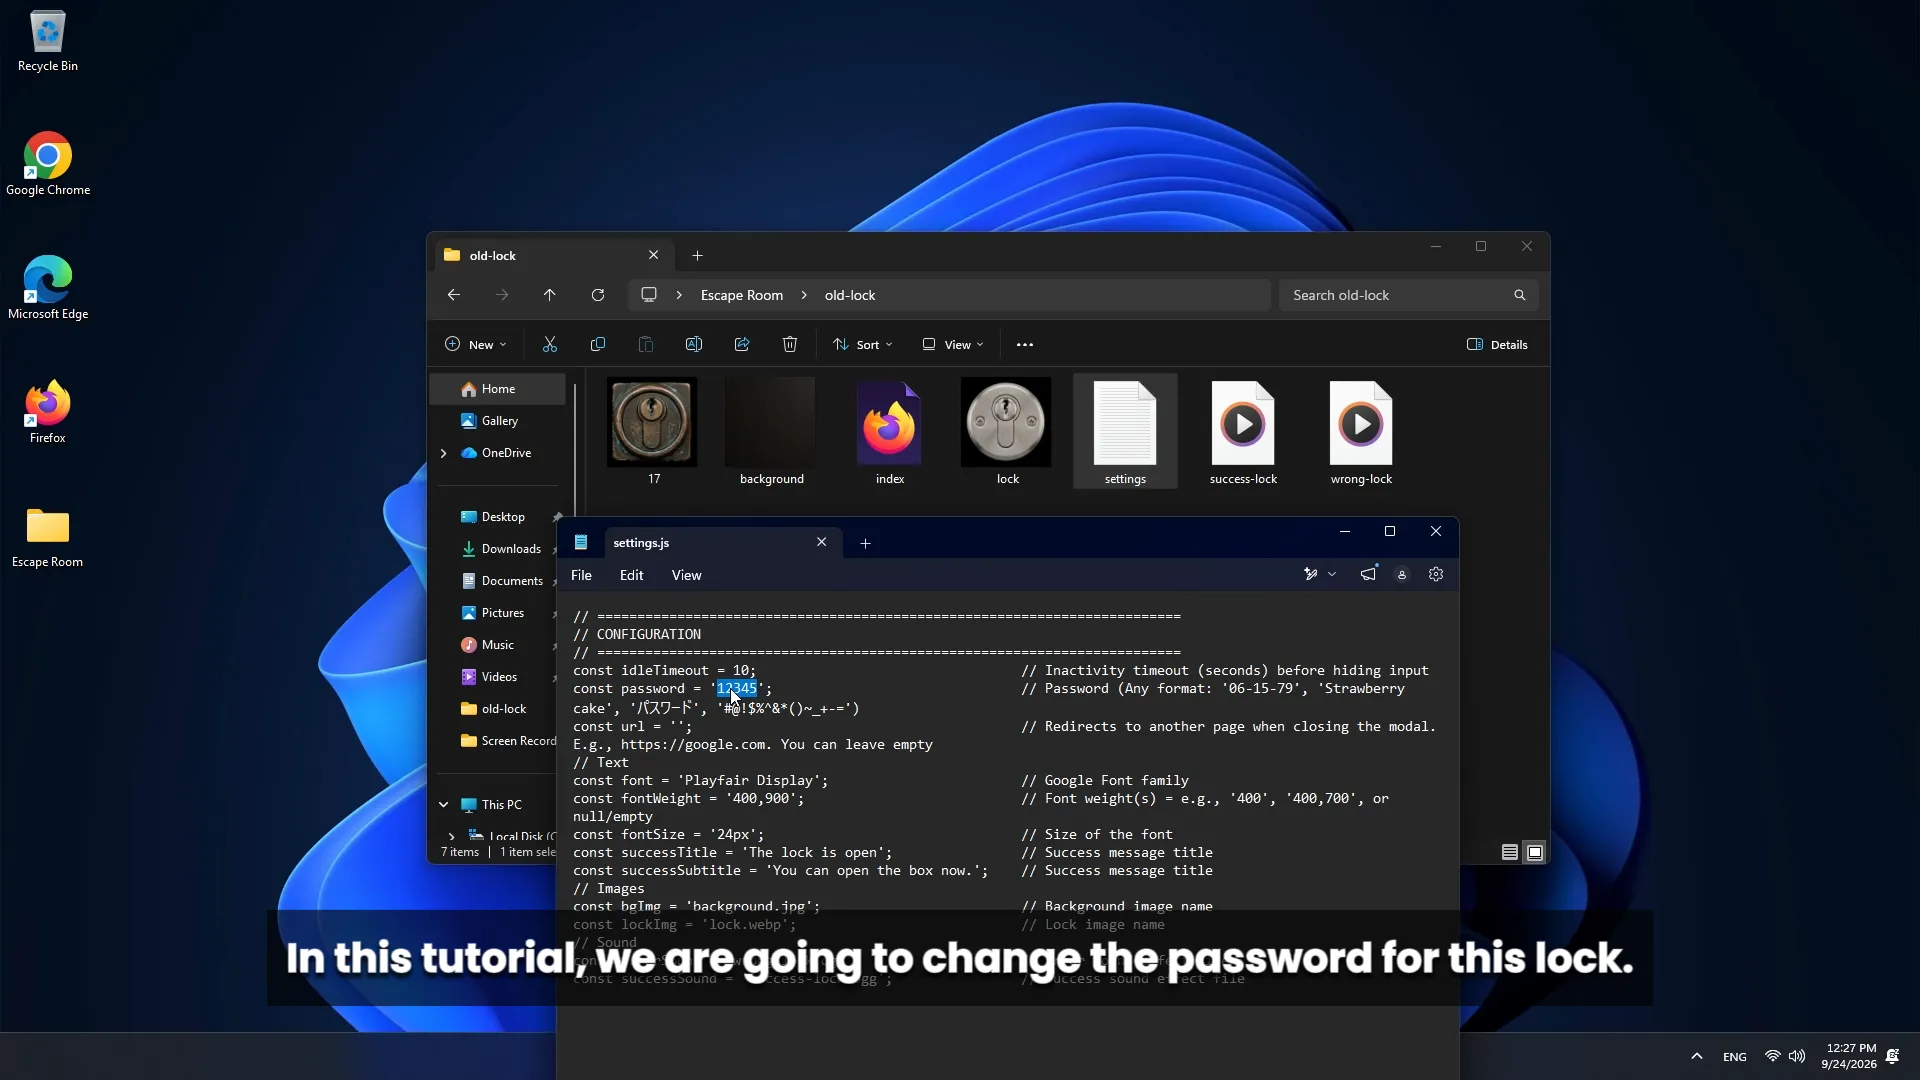
Open the settings.js file with a text or code editor to change the required parameters. For example:

  • Password: Edit the password variable value (e.g., change from 12345 to password).
  • Background image / Padlock: Change the image file path if you want to replace the design with a different one.
1.3

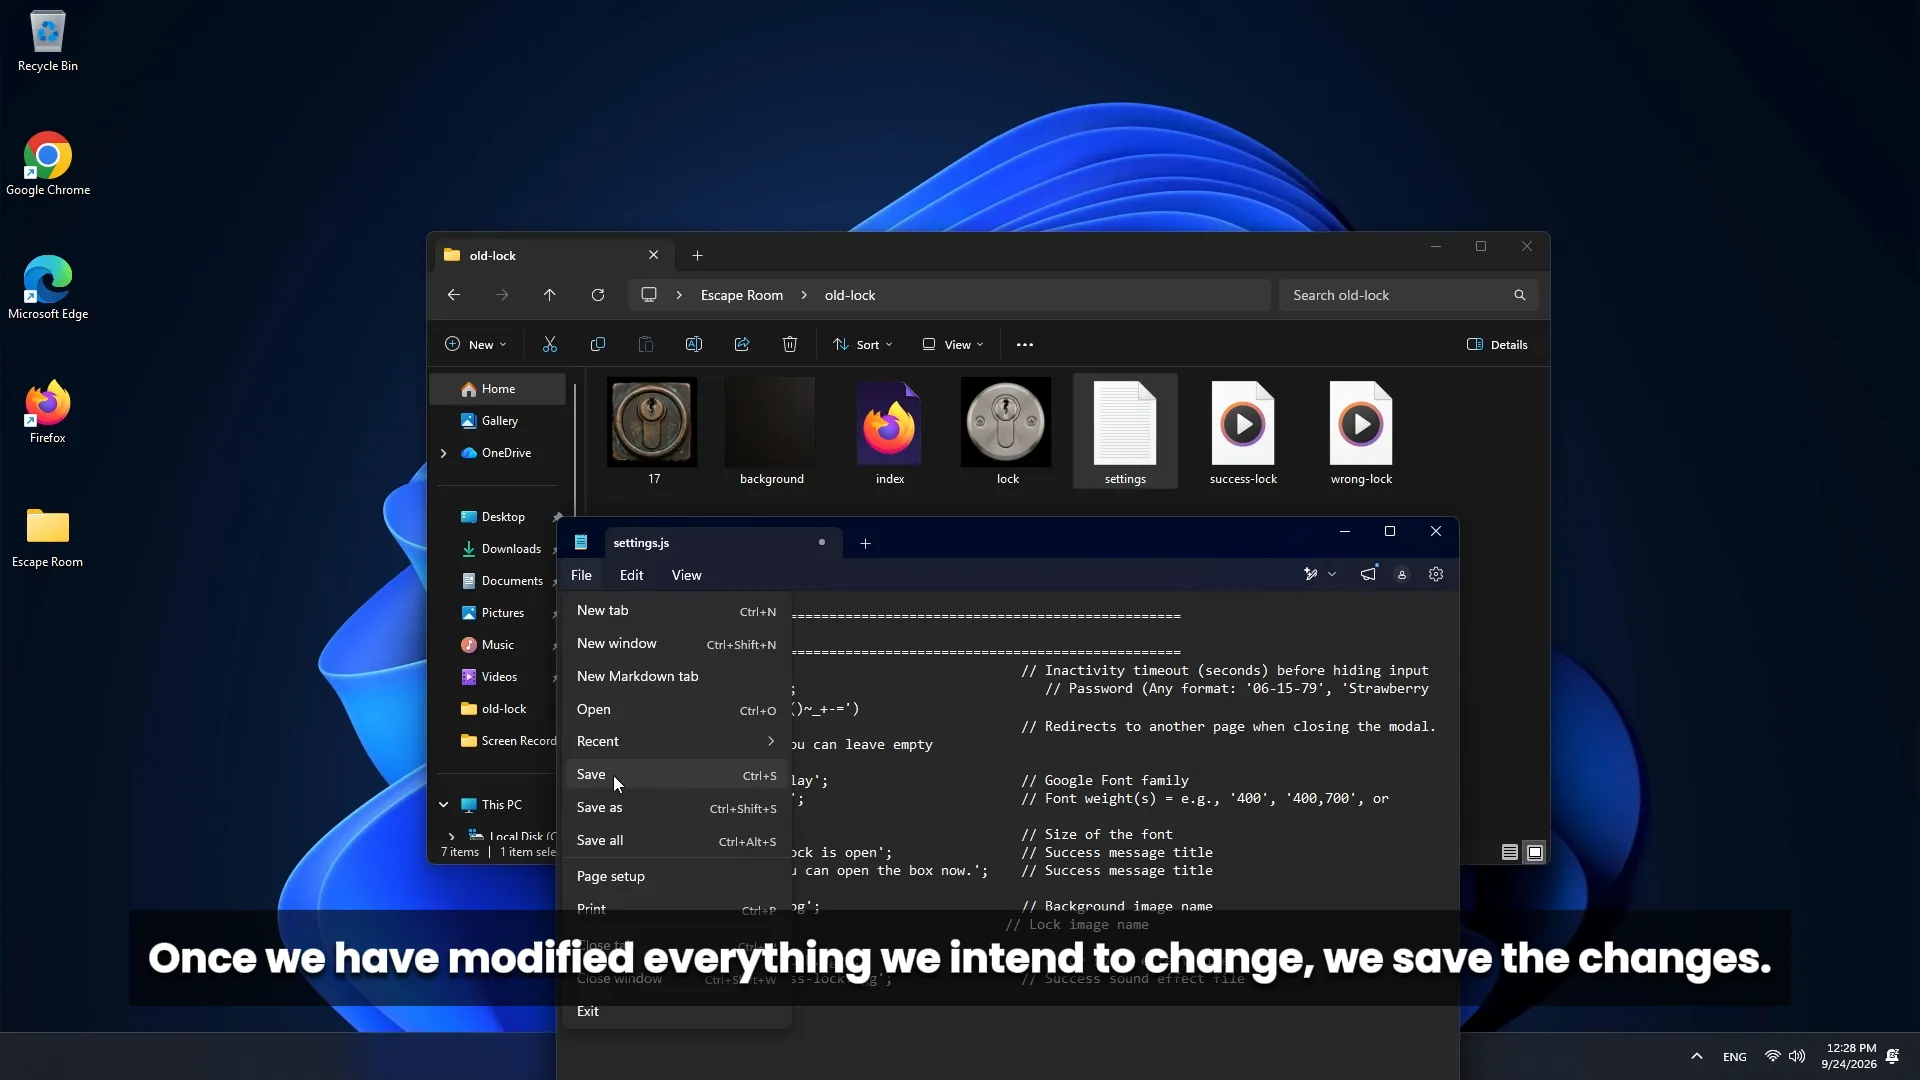
Save changes

Save changes

Once you have made the necessary modifications in the configuration code, save the settings.js file before closing the editor.

Phase 2

Re-upload the Complete Folder to Netlify

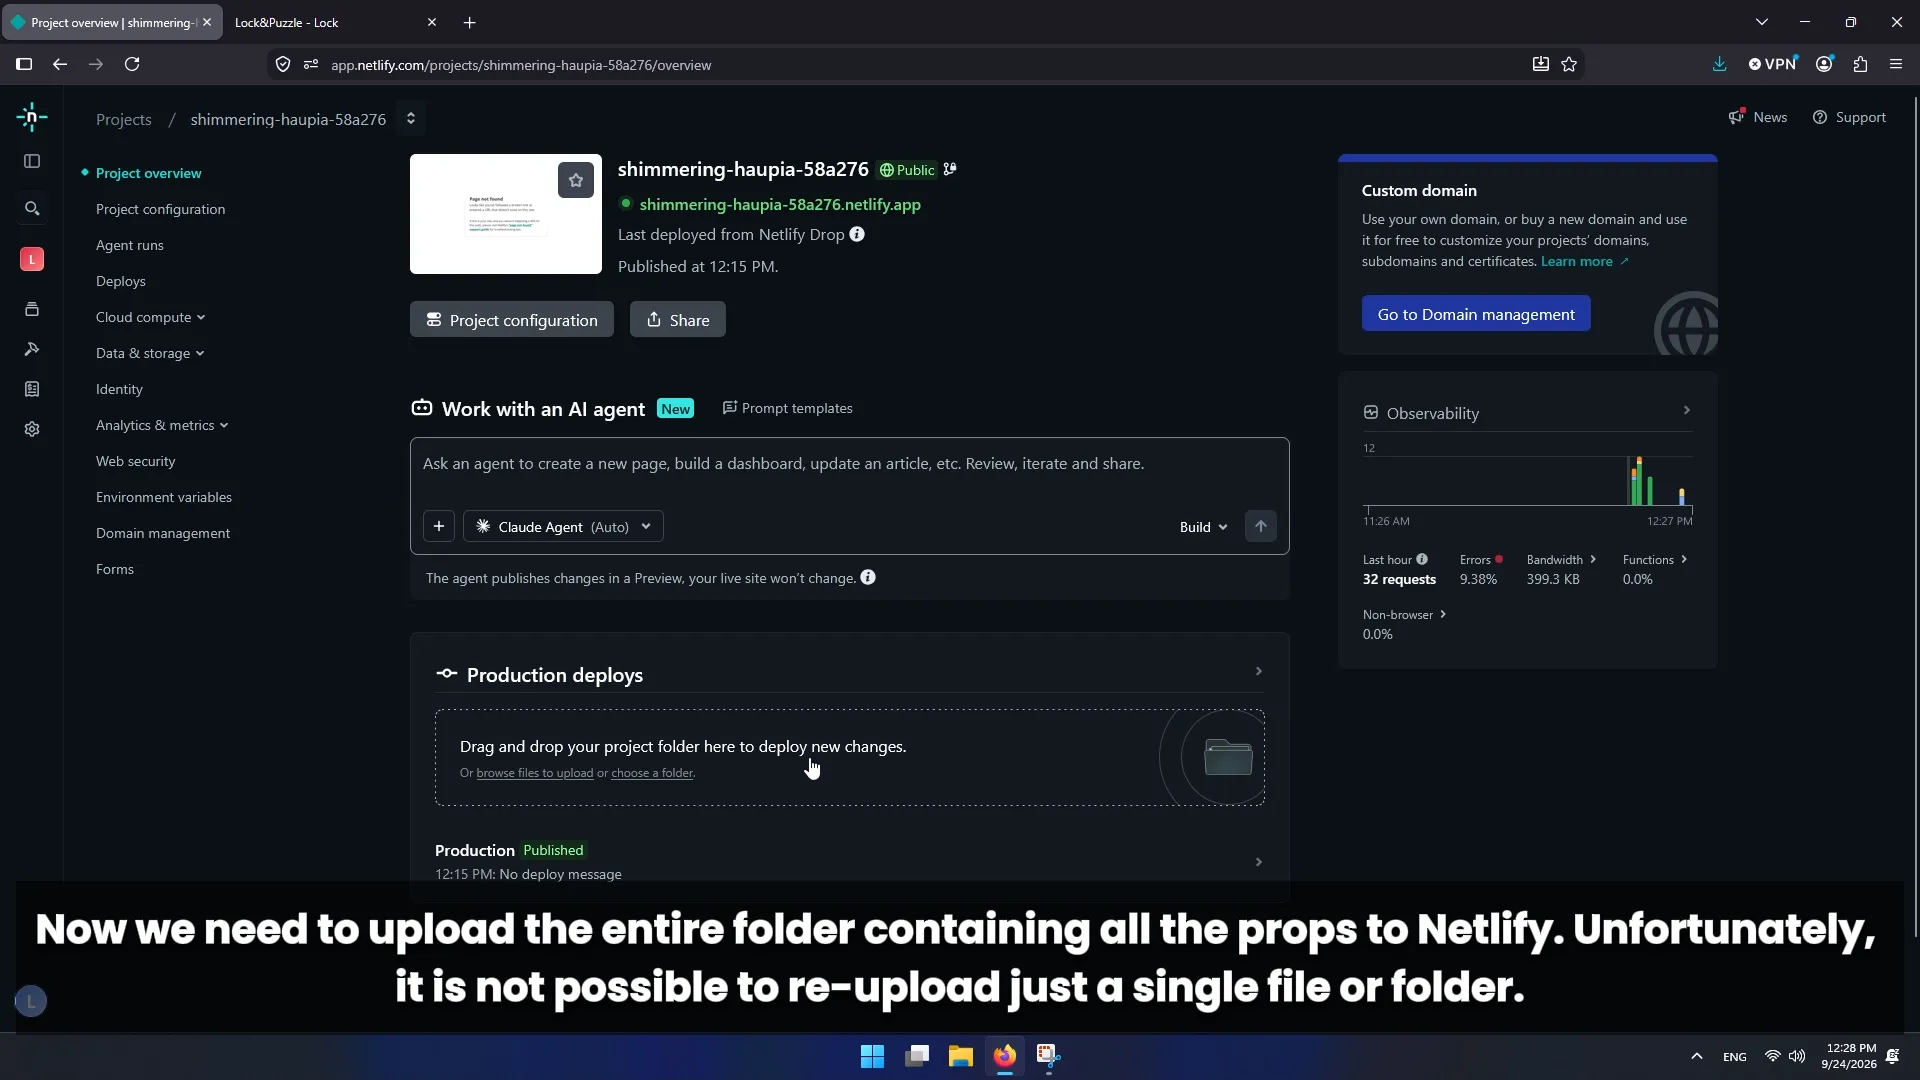
Remember! You cannot re-upload a single file or subfolder separately; you must re-upload the entire root folder containing all the props. In this example, it would be the EscapeRoom folder.

2.1

Access the Production Deploys area

Access Production Deploys area

Log in to your Netlify account and go to your website's administration section. Locate the Production deploys section.

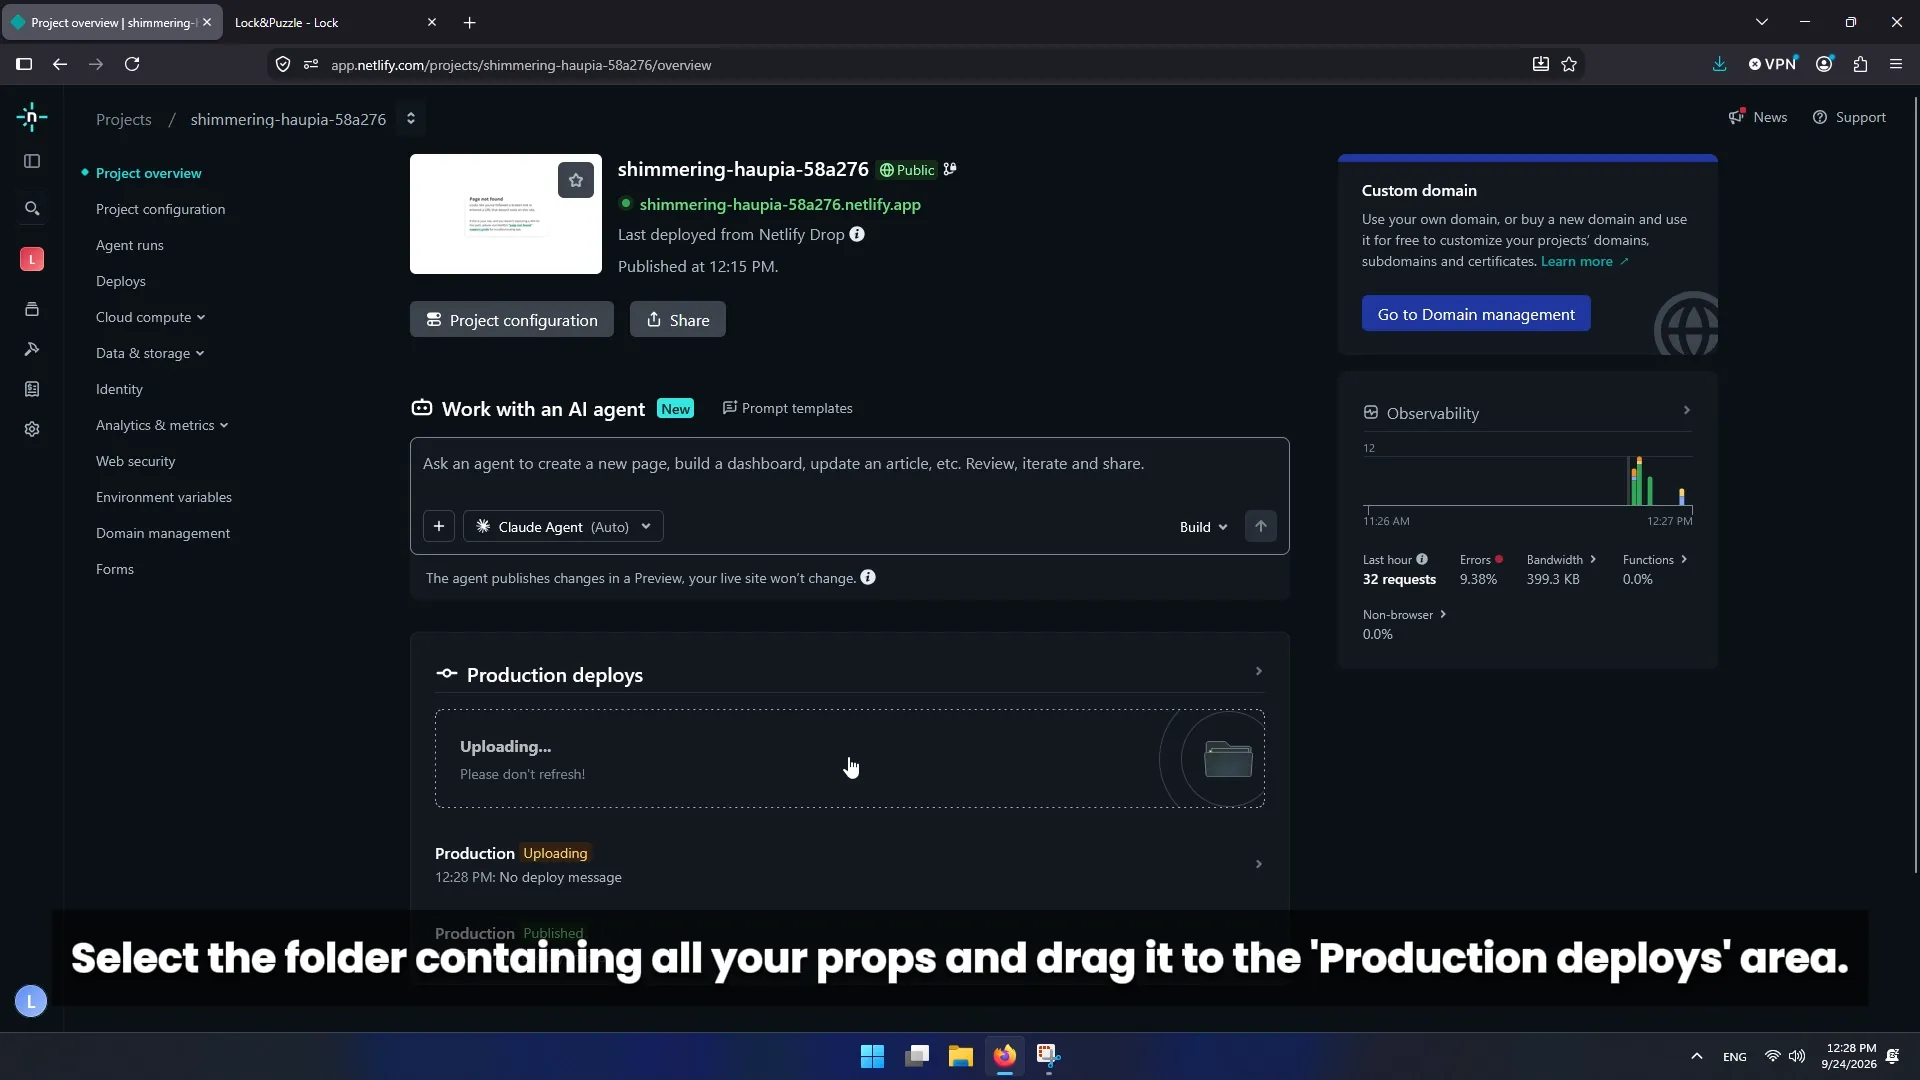
2.2

Drag the container folder

Drag the container folder

Select the main folder housing all the trials/props on your computer and drag it into the dashed box that says "Drag and drop your project folder here to deploy new changes".

Phase 3

Final Verification and Testing

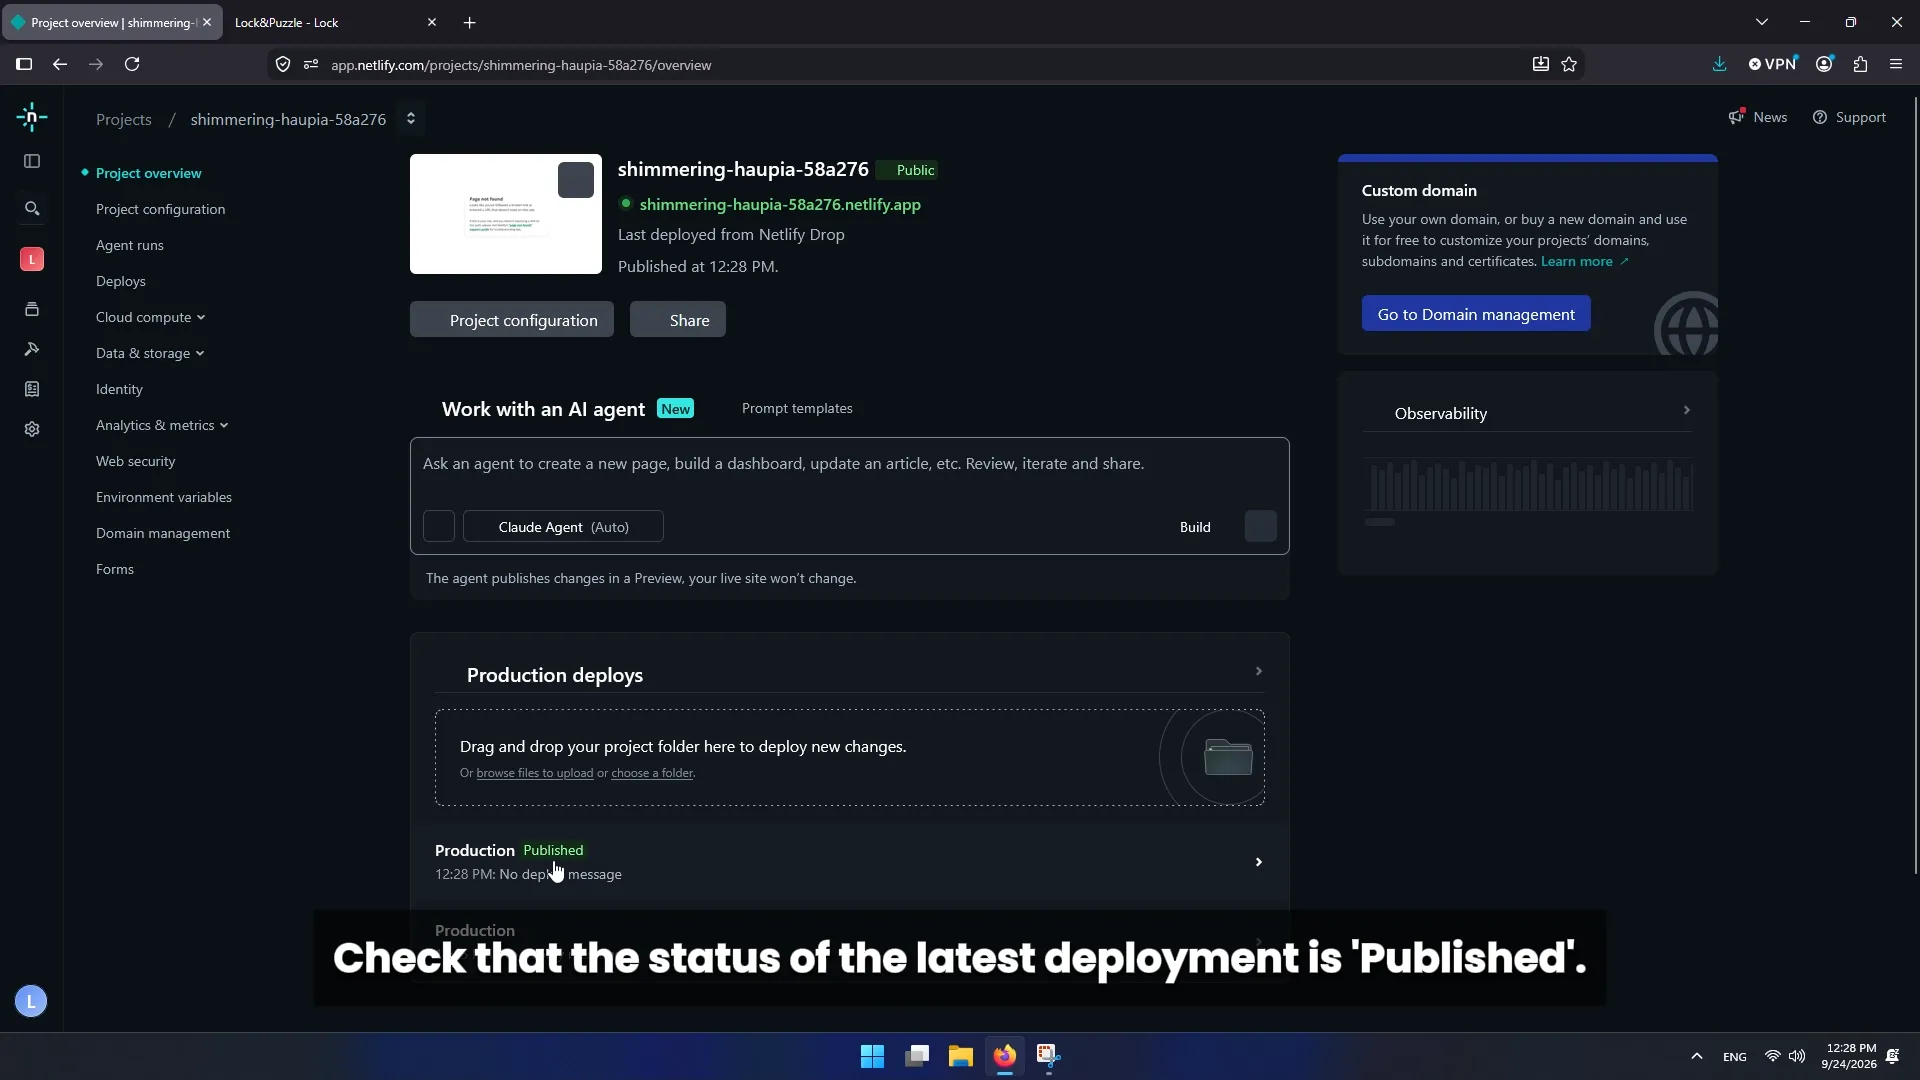
3.1

Check published status

Check published status

Once the upload process is complete, verify in the deploy history that the new status shows as Published.

3.2

Test changes on the web

Test changes on the web

Reload your puzzle's webpage in your browser to make sure the applied changes (new image, password, or text) work to perfection.

Caution

Mistakes to Avoid

Keep these points in mind to ensure your updates apply smoothly without errors.

  • Trying to re-upload only a single loose file instead of the complete container folder.
  • Forgetting to save changes in the settings.js file before re-uploading the project.
  • Not reloading the game webpage after performing the new deployment on Netlify.
  • Modifying paths or image names without placing them inside the corresponding folder.
Complete Netlify Update
Project Updated

Your changes are published and ready!

Whenever you want to change the password, interface, or rules of any of your digital props, just repeat this simple process to keep your escape rooms up to date. Remember to review the specific documentation for each puzzle to learn about all customizable parameters.